My experience with Hugo
This is my certificate of completion the course Learning Static Site Building with Hugo:

Based on this course, this short user guide explains how to create a static website using Hugo SSG.
Prerequisites:
- You have at least basic understanding of what is a static site generator (SSG) and the docs-as-code approach.
- You have installed and familiar with any source-code editor like Visual Studio Code.
- You’re familiar with Command Line Interface (CLI) like Command Prompt or Windows PowerShell.
- You’re familiar with Git commands and have Git installed on your local machine. If not, install Git and check it in the CLI by running
git --version. - You know the syntax of Markdown.
- You have account in GitHub.
User guide:
- Install Hugo, then check it in the CLI:
hugo version
- Create your website locally in a dedicated Hugo folder on your local machine, e.g., Sites, which should be separated from the installation Hugo folder, e.g., bin. Go to this folder in your CLI:
  cd C:\hugo\sites
  hugo new site <your_site_name>
  cd .\<your_site_name>
- Initiate your local Git repository for the site, check the list of untracked files, copy all the folders into the local Git repository, and commit these to Git:
  git init
  git status
  git add --all
  git commit -m "<Commit_message>"
- Place link of a selected Hugo theme into the themes root folder:
  cd themes
  git submodule add https://<github_theme> themes/<theme_name>
-
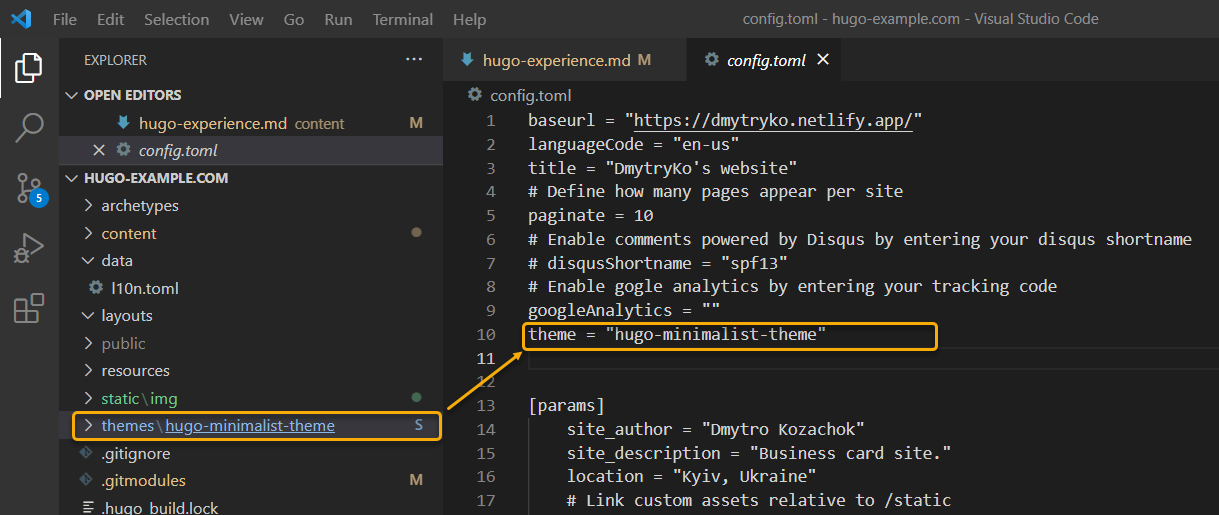
Copy the themes > theme_name > config.toml file content into the config.toml root file and then adjust there the required file properties:
For a Hugo theme with the localization file in place, e.g., l10n.toml for minimalist theme, copy this file from themes > theme_name > exampleSite > data folder into the data root project folder. Also, don’t forget to delete
themesDirproperty in your config.toml root file to be able to launch your site locally: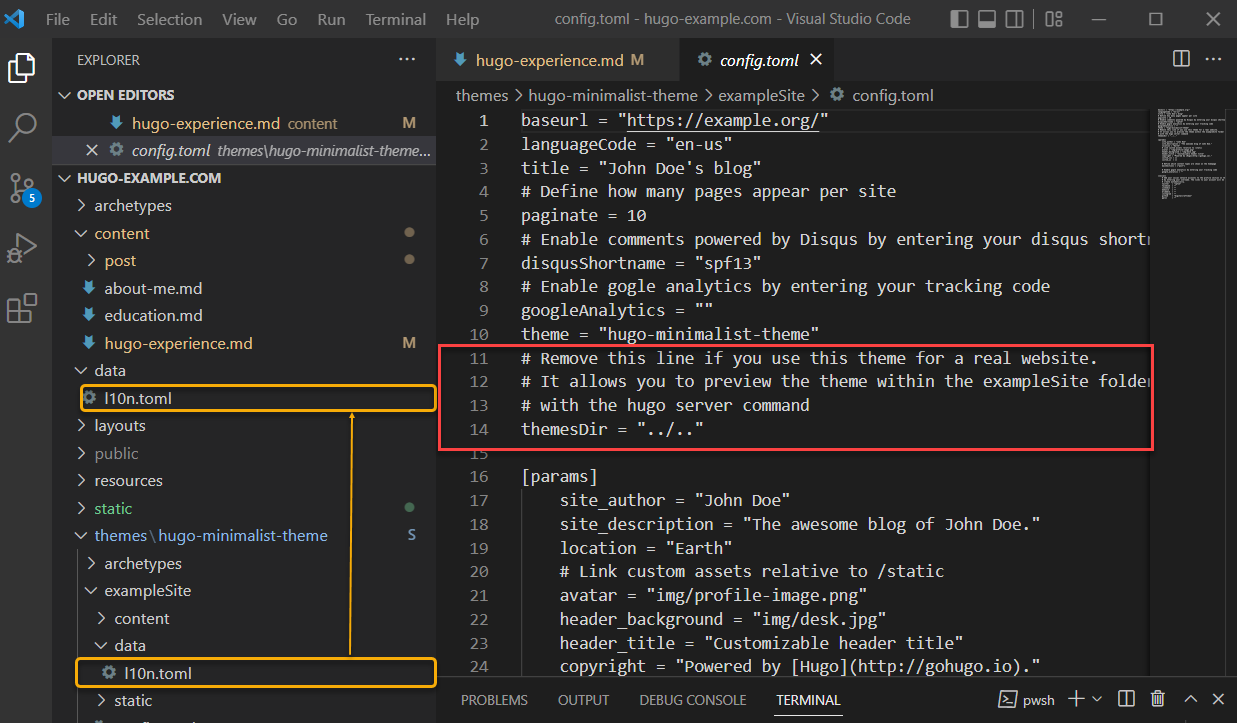
Commit the changes:
  git add --all
  git commit -m "<Commit_message>"
- Run your site on the local server localhost:1313:
hugo server
- Create a new page under the content root folder, or a new post under the content > post folder (e.g., posts are applicable for the blog-based Hugo themes like minimalist):
  hugo new <site_page_name>.md
  hugo new post/<site_post_name>.md
-
Create the static > img folder, place all required images there and update uploaded image-related properties in the config.toml root file. Recommendation: check the Disable cache box in the Network tab of your browser’s dev panel to avoid possible image caching.
-
Build your site:
hugo
- Create the .gitignore root file and enter the
public/property there (to make Git ignore the content of the public root project folder):
git add .gitignore
git commit -m "<Commit_message>"
- Create a GitHub repository for your Hugo project and push there the master branch from your local Git repository:
 git remote add origin https://<your_hithub_repository>
 git push -u origin master
-
Sign in to Travis CI with your GitHub account and sync your repository there.
-
Create the .travis.yml root file in your project with the script below to allow Travis CI to build your site each time you commit and push updates for your site:
  install:
  - wget https://<latest_github_hugo_linux_release>
  - sudo dpkg -i hugo*.deb
  - hugo version
  before_script:
  - rm -rf public
  script:
  - hugo
  branches:
   only:
   - master
- Commit and push the Travis script to Git – Travis will run the script automatically to build your site. If that didn’t happen, start the build manually on your project page in Travis:
  git add --all
  git commit -m "<Commit_message>"
  git push origin
-
(optional) Get a domain name for your site to public it on the Internet, e.g., using Namecheap.
-
Sign in to Netlify with your GitHub account, then deploy and name your site following the inline instructions. For more details, refer to the publish via Netlify article of my teammate Ivan Cheban.
-
Check out your website on the Internet by the Netlify link generated in the format <your_site_name>.netlify.app, e.g., https://dmytryko.netlify.app.
And last but not least!
Each time you make any updates to your site, don’t forget to apply them by sequential running these commands in the CLI:
  git add --all
  git commit -m "<Commit_message>"
  git push origin